How to Repair the Windows Bootloader After a Spoofer — Step-by-Step Guide
Windows won’t boot after using an HWID spoofer? A step-by-step guide to restoring the EFI boot partition from the command prompt on a bootable USB drive.
Some HWID spoofers operate at the Windows bootloader level and, if they stop incorrectly, can damage the EFI boot partition. As a result, the computer stops booting — you may see a black screen, errors like “No bootable device”, “Boot Device Not Found”, or the system enters an endless reboot loop.
This guide walks you through repairing the Windows bootloader without reinstalling the OS. All data on your disks stays intact.
What you’ll need
- A USB flash drive with Windows boot files (FAT32)
- Access to your PC’s BIOS/UEFI
- About 5–10 minutes
Important: You can create a bootable USB on any working PC. Use Microsoft’s official Media Creation Tool or the Rufus utility. Make sure the drive is formatted as FAT32 and contains the Windows setup files.
Step 1: Prepare the bootable USB drive
The flash drive should contain the standard Windows boot files. The layout looks like this:
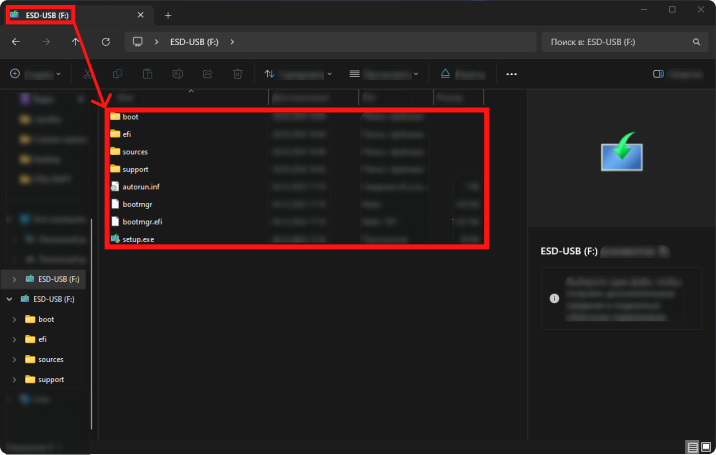
File layout on the bootable drive — folders boot, efi, sources, support and files bootmgr, bootmgr.efi, setup.exe.
If you don’t have a ready-made drive, create one from another PC using Media Creation Tool or Rufus.
Step 2: Boot from the USB drive
Insert the flash drive and open the boot device menu (Boot Menu). It’s often F12, F8, F11, or Esc right after power-on — it depends on your motherboard manufacturer.
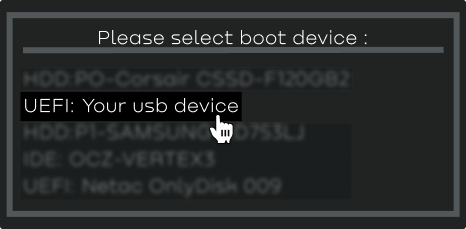
In Boot Menu, select your USB drive in UEFI mode.
Choose UEFI: Your USB device (the exact label may differ).
Step 3: Open Command Prompt
After booting from the USB, you’ll see the standard Windows Setup screen with language selection.
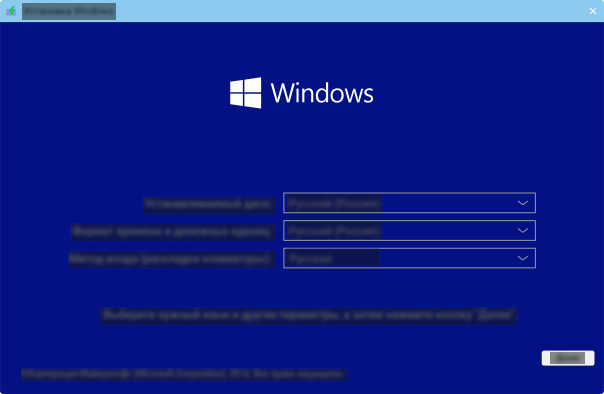
Do not click “Next”! We are not installing Windows. Instead, press Shift + F10 — this opens Command Prompt.
Step 4: Find the EFI partition and repair the bootloader
In Command Prompt, enter the commands below one after another. Confirm each with Enter.
4.1. Start DiskPart
diskpartThe disk and partition utility will open.
4.2. List volumes
list volA list of all volumes appears. Find the EFI system partition by these signs:
- Size: about 100 MB
- File system: FAT32
- Label: SYSTEM, EFI, or blank
- Often no drive letter
4.3. Select the EFI volume
sel vol 5Replace 5 with the volume number that matches your EFI partition from the previous step.
4.4. Format the partition
format fs=fat32 quickQuick-formats the selected volume as FAT32 — clears corrupted bootloader contents.
4.5. Assign a drive letter
assign letter=ZThe partition gets a temporary Z: so you can work with it from the command line.
4.6. Exit DiskPart
exit4.7. Restore boot files
bcdboot C:\Windows /s Z: /f allWhat the parameters mean:
C:\Windows— path to your Windows installation (if your system drive letter differs, use the correct one)/s Z:— partition where boot files are copied/f all— creates boot files for both UEFI and Legacy BIOS
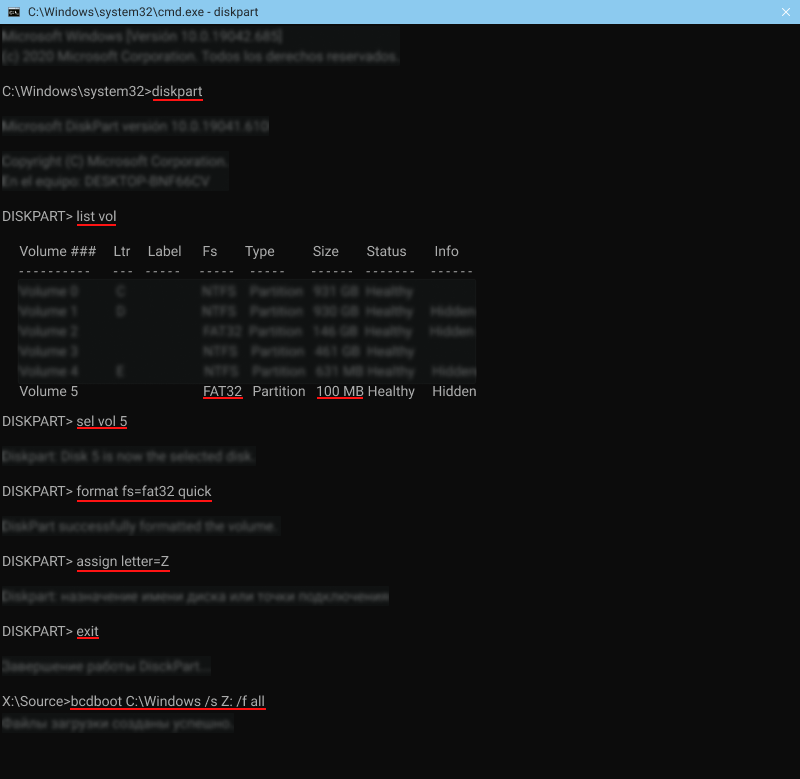
Example of running all commands — from diskpart through bcdboot. After bcdboot you should see “Boot files successfully created.”
Step 5: Finish up
- Close Command Prompt
- Shut down the computer
- Remove the USB flash drive
- Turn the computer on
Windows should boot normally. All data, apps, and settings remain — repairing the bootloader does not touch the contents of the system partition.
FAQ
My system drive isn’t C:
In the recovery environment, drive letters may differ from what you’re used to. If bcdboot C:\Windows fails — check other drives with dir D:\Windows, dir E:\Windows, and so on until you find the partition with Windows installed.
I can’t find the EFI partition
If list vol shows no ~100 MB FAT32 volume — the EFI partition may have been deleted. In that case, recreate it in DiskPart (create partition efi size=100), format as FAT32, then run bcdboot.
It still won’t boot after repair
Check the boot mode in BIOS: if Windows was installed in UEFI mode, UEFI Boot should be selected, not Legacy/CSM. Also ensure Secure Boot is enabled if you’re on Windows 11.
Why this happens
HWID spoofers that work through the bootloader (boot-level spoofers) modify files on the EFI partition to change hardware identifiers before the OS loads. If the process is interrupted (BSOD, power loss, forced reboot) — boot files can end up corrupted.
This isn’t about spoofer “quality” — any tool that runs at the bootloader level carries similar risk if it doesn’t shut down cleanly.
Need a reliable spoofer? On IVSOFTE you can buy trusted HWID spoofers for EAC, BattlEye, Ricochet, and other anti-cheats. Browse spoofers →